By panipopos
I've been on a fruity drink buzz lately because of all the fresh summer fruits that have become available. Here's the video for the watermelon drink recipe posted earlier. Enjoy playing around with these drink recipes!
http://panipopos.blogspot.com

Thursday, July 22, 2010
Thursday, July 15, 2010
Vaimeleni - Watermelon Drink
By panipopos

Last week my friend gave me a watermelon, a traditional summer gift in this part of the world. Even after giving half of it to the neighbours, I still wasn't sure how I was going to eat the other half. It just seemed so huge.
Then it suddenly dawned on me, I didn't have to eat it, I could drink it.
This watermelon concoction is more commonly associated with Tonga (where it's known as otai) than with Samoa, but variations of this drink are found across the Pacific Islands. This is my favourite version of it, and it's inspired by my sister O. Just like her, it's sweet and cool, with just the right touch of coconut.
Vaimeleni is the kind of drink you make out on the porch, on a hot slow summer's day when you've got nothing better to do. Wear an old lavalava and T-shirt, because the watermelon scraping can get quite messy. Better still, get some kids to do the scraping. This is a drink that's fun and messy and delicious.

http://www.samoafood.com

Last week my friend gave me a watermelon, a traditional summer gift in this part of the world. Even after giving half of it to the neighbours, I still wasn't sure how I was going to eat the other half. It just seemed so huge.
Then it suddenly dawned on me, I didn't have to eat it, I could drink it.
This watermelon concoction is more commonly associated with Tonga (where it's known as otai) than with Samoa, but variations of this drink are found across the Pacific Islands. This is my favourite version of it, and it's inspired by my sister O. Just like her, it's sweet and cool, with just the right touch of coconut.
Vaimeleni is the kind of drink you make out on the porch, on a hot slow summer's day when you've got nothing better to do. Wear an old lavalava and T-shirt, because the watermelon scraping can get quite messy. Better still, get some kids to do the scraping. This is a drink that's fun and messy and delicious.

Vaimeleni (makes 3-4 liters/quarts)
½ medium watermelon
½ cup (25g) grated coconut
1 cup (240ml) coconut milk
2 cups (480ml) water
2 tablespoons (30ml) lemon juice
½ a 567g (20 oz) can of crushed pineapple
(optional)
sugar (to taste)
ice cubes for serving
With all the ingredients above, fresh is best, except for the pineapple (see the vaifala post for why).
Use a fork or spoon to scrape out the watermelon flesh into a large bowl. Catch the juice too, so you end up with a chunky kind of slush. Remove seeds with a spoon, though you can ignore the yellow ones.
Add everything else, except for the sugar and ice, and mix well. As with thevaifala, mix and taste, dilute and sweeten, until you have the taste you like.
Chill and serve over ice, in a tall glass with a spoon. And be sure to stir it well before you present it, just so the fruit is well-distributed and the coconut milk is incorporated.
* You can substitute pineapple juice for the water, and mango for the watermelon. I've also had versions of this with grated apple and papaya.
http://www.samoafood.com
Wednesday, July 14, 2010
Vaifala Recipe Video
By panipopos
So I'm drinking the vaifala I made as I'm writing this and, believe it or not, this drink is even better the next day. Just posted up a video for the vaifala recipe, so you can see how simple it is to make.
See, told you it was easy!
Enjoy!
http://panipopos.blogspot.com
So I'm drinking the vaifala I made as I'm writing this and, believe it or not, this drink is even better the next day. Just posted up a video for the vaifala recipe, so you can see how simple it is to make.
See, told you it was easy!
Enjoy!
http://panipopos.blogspot.com
Monday, July 12, 2010
Vaifala - Pineapple Drink
By panipopos
The Womens' Committee for our church used to do an annual tour of everyone's houses. In the week leading up to this tour, my mother would do a complete revamp of our house, wiping every surface in the house, cleaning walls and the ceiling (!), trimming and weeding out the garden, even scrubbing and detailing the outside walls and windows. After the Women's Committee had inspected our house, my mother would serve them this refreshing Samoan drink. Perfect for a hot summer's day and the end of a long week of cleaning.


http://panipopos.blogspot.com
Friday, July 9, 2010
Apa pe'epe'e - Canned coconut milk
By panipopos
I had to choose a canned coconut milk to use for my panipopo. But there are only two kinds of coconut milk that are available at my supermarket. So I buy them both and take them home.
It’s a really warm day and even warmer in my kitchen, so when I open the cans up, you don’t see the coconut cream at the top of the can like you would in cooler weather.

Instead, the first thing you notice (aside from the jagged edge caused by my ancient can opener) is the difference in colour. The one on the left is this nice pure white milky colour, and the one on the right is kinda grey and oily looking.
To get a better look, I pour each one into a glass, and immediately the whiter one separates into two beautiful clear layers (oil and milk, I presume), while the other looks murky and lumpy.

I gotta say though, even though the one on the left looks better, the one on the right smells more fragrant and coconutty, and the texture seems more authentic. Which one should I choose? Oh decisions, decisions.
While I’m trying to decide which one to use on those panipopo that I just spent 20 minutes kneading (in other words. I will be very P.O.’d if the sauce ruins my buns), I happen to glance at the back of the coconut milk cans. And in a split second, the decision is made.

I knew the one on the left looked too good to be true!
So what’s up with the Snow White coconut milk?
Why four ingredients?
First ingredient is coconut milk. I should think so!
Second ingredient is water.
So these guys are watering down my coconut milk? OK…I can accept that, for processing or whatever, sure, a little water doesn’t hurt, right?
Third ingredient is carboxymethol cellulose.
What the…?
What is this?
According to Wikipedia, CMC (as it’s known in the business) “is used in food science as a viscosity modifier or thickener, and to stablize emulsions in various products including ice cream.” A viscosity modifier? A thickener?
Well if you didn’t water down my coconut milk in the first place, then you wouldn’t have needed a thickener, now would you?
Last ingredient is something else chemical sounding. I mean, it starts with an X. Xanthan Gum. Turns out that this too is a thickener, stabiliser, viscosity controller.
Well, I don’t know about you, but I believe that “if it ain’t broke, don’t fix it”, and these guys have tried to fix a product that was perfectly fine to begin with. There’s absolutely nothing wrong with 100% pure, natural, not-so-easy-on-the-eyes, doesn’t-separate-into-two-perfect-layers coconut milk, and that, of course, was the one I ultimately used.
http://panipopos.blogspot.com/
Monday, July 5, 2010
Pe'epe'e - Fresh coconut milk
 By panipopos
 Coconuts are a key ingredient to Samoan cooking. Every part of the coconut is used. You can eat the flesh raw or use it for cooking, you can drink the juice, the shell makes a handy ava cup or, together with the husks, you can fuel a cooking fire. The most widely used product from the coconut is coconut milk, so let me describe how we traditionally make the milk, how you can make this milk at home, and what you can substitute if, like me, there are no coconuts anywhere near where you live.
Traditional preparation
Once husked, the coconut is split in half. How do you split it? Well, my dad says that on one end of the coconut is a face made of two eyes and a nose (no mouth!). (There’s a story behind this face that stars an eel, but that’s for another blog post.) If you imagine a line going from between the eyes to the other end of the coconut, the midpoint of that line is the weakest point of the nut, and that is where you should deliver your first blow. So you use the blunt side of a machete to crack around the equator of the coconut and split it in half. You can drink or discard the juice, and eat or discard any spongy yellowish stuff inside the coconut. Now it’s time to grate the flesh while it’s still inside the shell.
For this, Samoans devised a coconut grating stool (mata tuai) that you can comfortably grate dozens of coconuts on, provided your arms hold out. The grated coconut, penu, is then strained through a tauaga, which is a bunch of fibrous strands from the laufao plant. The creamy liquid that is extracted is the coconut milk that is used for cooking.
 Modern preparation
Some Samoans living outside the islands still make coconut milk this traditional way, but if they live in a less tropical climate, they’ll add some boiling water to the grated coconut to help extract the milk. If you don’t add boiling water, then the product will be more oily than creamy.
You can simulate the traditional Samoan preparation by buying 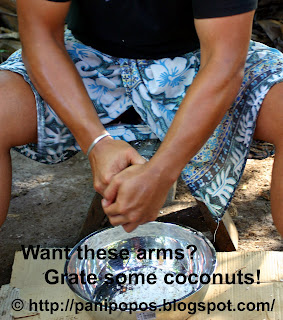 a fresh coconut. Shake it around in the store – don’t drop it! – the more liquid you hear sloshing around in there, the better. Split it open with the blunt side of a cleaver or similar object, then cut or pry out pieces of the coconut flesh. Grate these with a box grater, using the coarsest grating surface, or shred the coconut with a food processor. One coconut should give you about 3 cups of grated coconut. Put this is a bowl and add 1½-2 cups of boiling water and let this steep for about 10 minutes. Then, using your hands or a muslin cloth, squeeze out as much milk as you can from the grated coconut, reserving the pulp for another use (eg. mix it into muffins or cake). The result is almost as good as the original, without the benefit of a full arm workout.
a fresh coconut. Shake it around in the store – don’t drop it! – the more liquid you hear sloshing around in there, the better. Split it open with the blunt side of a cleaver or similar object, then cut or pry out pieces of the coconut flesh. Grate these with a box grater, using the coarsest grating surface, or shred the coconut with a food processor. One coconut should give you about 3 cups of grated coconut. Put this is a bowl and add 1½-2 cups of boiling water and let this steep for about 10 minutes. Then, using your hands or a muslin cloth, squeeze out as much milk as you can from the grated coconut, reserving the pulp for another use (eg. mix it into muffins or cake). The result is almost as good as the original, without the benefit of a full arm workout.Alternatives
Say you can’t get coconuts at your local supermarket. Or say you can, but you don’t have the time to be grating and squeezing out the milk. Or say you have the time, but you’re just plain lazy. You can still enjoy Samoan food by using canned coconut milk, or the stuff that comes in cartons. Most Samoans outside the islands use these and you can find them in most supermarkets or Asian stores for a reasonable price. But beware. Not all mass-produced coconut milks are created equal.
Say you can’t get coconuts at your local supermarket. Or say you can, but you don’t have the time to be grating and squeezing out the milk. Or say you have the time, but you’re just plain lazy. You can still enjoy Samoan food by using canned coconut milk, or the stuff that comes in cartons. Most Samoans outside the islands use these and you can find them in most supermarkets or Asian stores for a reasonable price. But beware. Not all mass-produced coconut milks are created equal.
As far as frozen, powdered or any other type of coconut milk goes, don’t bother with it. The nuances of flavour, not to mention cooking qualities, are completely lost in these forms of coconut milk. Plus, I don’t know any Samoan that uses them, so stick to the fresh stuff, or the canned/carton coconut milk.
http://panipopos.blogspot.com/
Thursday, July 1, 2010
Panipopo Recipe Video and variations
By panipopos
Today I posted up a video of How to Make Panipopo. Hope that the video, together with the recipe here, make it clear that anyone can make these buns.
Today I posted up a video of How to Make Panipopo. Hope that the video, together with the recipe here, make it clear that anyone can make these buns.
Some variations to the recipe are:
- Use butter, margarine or even shortening as a substitute for the oil. I happen to use oil because I always have it on hand, and it's easier to measure out that the other fats.
- Use milk instead of the water. You have the scald the milk first (heat until bubbling at the edges but not boiling) then cool it down to lukewarm before using it. Milk makes for a slightly richer dough and helps the buns keep longer.
- Even better than milk or water, use leftover water that potatoes have been boiled in. Yeast loves this stuff so you'll get quite a rise.
- If you like a richer, thicker sauce, use 100% coconut milk. I just happen to like a lighter sauce. Another way you can get a thicker sauce is to add 1 tablespoon of flour or 2 teaspoons of cornstarch/cornflour to the coconut milk/water sauce and mix it well before pouring it over the buns.
- As mentioned in the video, better to bake panipopo in a square or rectangular baking pan. They look better, and they're all the same size so people aren't fighting over who got the big ones.
Manuia,
Subscribe to:
Posts (Atom)